I know that there are many how-to’s out there, but I wanted to document how I installed my new 16 tooth front sprocket for my 2009 Suzuki TU250. As I am very much not mechanically inclined, I wanted this to be as moron friendly as I could. Hopefully this will be a help for others out there, and will be a good refresher for me in the event that I have to do this again.
Tools needed:
Torque wrench
30mm socket
7mm socket
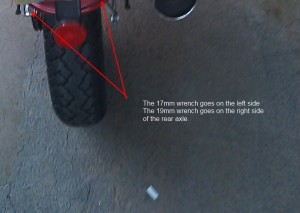
17mm wrench
19mm wrench
12mm wrench
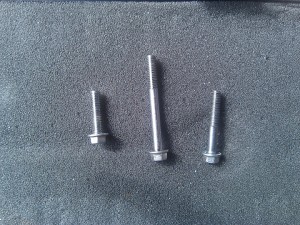
Step 1: Remove the front sprocket cover using the 7mm socket. There are three bolts that hold in the cover, shown below.
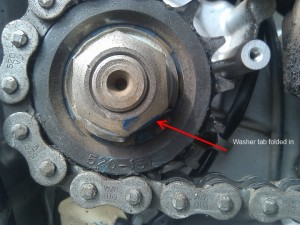
Step 2: Flatten the lock washer tabs that holds the 30mm nut in place.
Step 3: Remove the 30mm nut, using the wrench and socket.
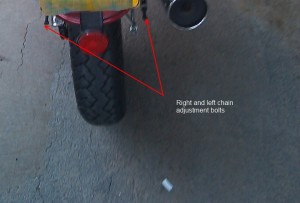
Step 4: Move the rear wheel forward, using the chain adjustment.

Once the rear axle is loose, the chain adjustment screws can be loosened to allow the rear wheel to move forward.
Step 5: Once the rear wheel is moved forward, the old front sprocket can then be removed and replaced with the new sprocket. Once the new sprocket is in, tighten the 30mm nut so it is secure. Reverse the above procedures to tighten the chain back to its recommended setting (10-20mm), then tighten the 30mm nut to 65ft/lb of torque, placing the wheel chock on the rear of the rear tire to keep the bike from getting away.

My mark for chain tightness moved inward slightly (which to be expected with a larger front sprocket).
Step 7: Re-install the front sprocket cover. Project completed!
I have ridden for about a week now with the new sprocket. These are my findings:
1) Performance in heavy head winds is similar to the original. I normally need to shift into third gear to keep at highway speed (20-30 knot wind). In no-wind conditions, there is a slight improvement, allowing me to stay at 65-68 mph in fourth gear, 60 – 62 mph in fifth gear.
2) The first three gears have a marked improvement in performance for city travel. The torque of the TU’s engine is very nice in these gears and makes for a very fun runabout.
3) Fuel mileage appears to be similar, but since I have ridden only 200 miles so far, I cannot state this as fact just yet.
If anyone has any questions or if there is something missing/erroneous in this post, please let me know so I can correct it.


I’m a mechanical moron and was too afraid to tackle this myself, but your pictures make it look really straightforward. Thanks, man!
Nice work. I just used your photos to change the front sprocket on my GN250 (mechanically the same bike) and it went very easily. The difference is subtle but definitely worth it, the bike still launches with barely any throttle needed and the longer 1st gear suits it much better. Haven;t taken it on the highway yet but I imagine the improvement at highway speeds will be noticeable.