Out with the old, in with the new?

February 6th, 2014

Since this website was going to revolve around beer before getting buried in work, family, and the conventional but important parts of life, I had not been able to make a beer in quite some time.  As I was trying to clean my basement this evening in preparation for a new job, I came across a can of malt from a LONG time ago (best before July, 2008) and a bag of fairly dubious-looking dark malt.  I had to do something about it.

Grabbing my dusty and unused bits, I did a quick clean of the materials, and started a boil.  During the boil, I found that I had no cleaning solution, no funnels, and one working airlock for a six gallon bucket.  I had already opened the can and started a solution for the brewing yeast from the top of the can.  I had to make do.   Sometime in the process, I found some hops and added them to the last 10-15 minutes of the boil, ending with:

1) One can – Scotmalt’s Ironmaster Special Lager (expired five years ago)

2) 1lb – Dark unhopped yeast (also old and dubious)

3) 1oz Willamette Hops pellets from Brewcraft (frozen maybe three to four years ago)

4) About 1lb White Sugar (cause this batch was probably not going to be awesome)

This does not bode well for this batch, but as I will be ridding myself of a good job that was getting old, perhaps a bit of the old will help make something new and awesome.  Could it be a vile, dark batch of horrid swill?  Possibly, but we shall see.   I don’t have a name for this one, yet, but if I die from the brew I vote for “Leftover Surprise”.  I will post the specific gravity as I get to pitching the old but possibly still viable yeast.

EDIT — Okay, forgot to get the S.G., but the beer has a potential alcohol level of 5.5%.  And it’s bubbling just fine for being five-year-old yeast
 

Changed the saddlebags slightly

July 3rd, 2011

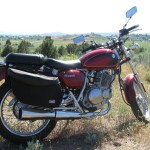
During my ride around today, my saddlebags kept inching forward.  To remedy this, I moved my Tour Master saddlebags under the rear seat.  Getting it under there was easy, but to put the seat back on was a real pain.   It took a lot of forward pressure to get all the holes aligned, but the result should work better.


Woohoo! Moved the rear turn signals!

May 8th, 2011

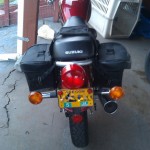
Well, I got the rear turn signals moved today.  It appears to be working well.  I will have a more detailed description of how I did this, but wanted to put a quick couple of pics up.  I made an extension cable (19.5 in) that uses the Suzuki OEM connector, so I can try it out and if I don’t like it the procedure can be reversed VERY easily.


How to install a new sprocket into a Suzuki TU250

May 8th, 2011

I know that there are many how-to’s out there, but I wanted to document how I installed my new 16 tooth front sprocket for my 2009 Suzuki TU250.  As I am very much not mechanically inclined, I wanted this to be as moron friendly as I could.  Hopefully this will be a help for others out there, and will be a good refresher for me in the event that I have to do this again.


Tools needed:

Torque wrench

30mm socket

7mm socket

17mm wrench

19mm wrench

12mm wrench


Step 1: Remove the front sprocket cover using the 7mm socket.  There are three bolts that hold in the cover, shown below.


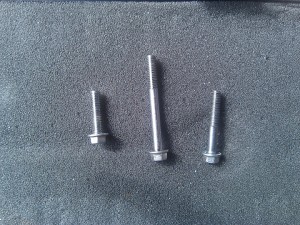
This shows the location of the three 7mm bolts that hold the front sprocket cover in place.

The three 7mm Bolts; Top, Middle, and Bottom


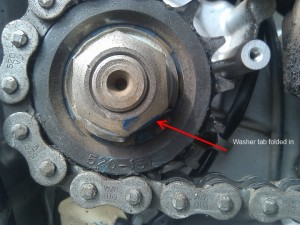
Step 2:  Flatten the lock washer tabs that holds the 30mm nut in place.


Step 3:  Remove the 30mm nut, using the wrench and socket.

The brick next to the tire keeps the bike from moving. A wheel chock would be better.


Step 4:  Move the rear wheel forward, using the chain adjustment.

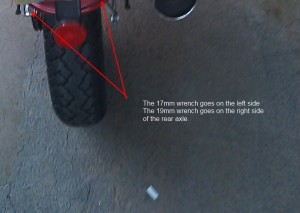
Loosen the rear axle nut using the 17mm and 19 mm wrenches.

17mm on Left, 19mm on Right.


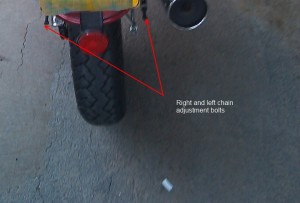
Once the rear axle is loose, the chain adjustment screws can be loosened to allow the rear wheel to move forward.


Step 5:  Once the rear wheel is moved forward, the old front sprocket can then be removed and replaced with the new sprocket.  Once the new sprocket is in, tighten the 30mm nut so it is secure.  Reverse the above procedures to tighten the chain back to its recommended setting (10-20mm), then tighten the 30mm nut to 65ft/lb of torque, placing the wheel chock on the rear of the rear tire to keep the bike from getting away.

Make sure to re-bend the washer tab AFTER tightening the 30mm nut to the appropriate torque.

My mark for chain tightness moved inward slightly (which to be expected with a larger front sprocket).

Step 7:  Re-install the front sprocket cover.  Project completed!


I have ridden for about a week now with the new sprocket.  These are my findings:

1)  Performance in heavy head winds is similar to the original.  I normally need to shift into third gear to keep at highway speed (20-30 knot wind).  In no-wind conditions, there is a slight improvement, allowing me to stay at 65-68 mph in fourth gear, 60 – 62 mph in fifth gear.

2)  The first three gears have a marked improvement in performance for city travel.  The torque of the TU’s engine is very nice in these gears and makes for a very fun runabout.

3) Fuel mileage appears to be similar, but since I have ridden only 200 miles so far, I cannot state this as fact just yet.


If anyone has any questions or if there is something missing/erroneous in this post, please let me know so I can correct it.

Finally got this thing working!

March 14th, 2011

Okay, just got this working.  Most of what I will post here will be about my hobbies, such as beer, radios, and motorcycles as I see fit.  We shall see where this goes.